If you try to drill wooden or steel objects and find out that your drill bits are not spinning as much as they once did, but emitting plumes of smoke and making high squeaky noises, some of them may no longer function properly.
Don’t worry because our article will show you how to sharpen drill bits with angle grinders, as well as other alternative sharpeners.
Contents
How To Sharpen Drill Bits With An Angle Grinder?
Angle grinders are among the most practical equipment for sharpening drill bits. However, to make your work easier, you’ll need a drill bit sharpening jig.
You should make the wooden jig according to the point angle of the drill bit that you want to sharpen. For example, if the point angle is 135 degrees, use a 67.5-degree line compared to the base to mark this block.
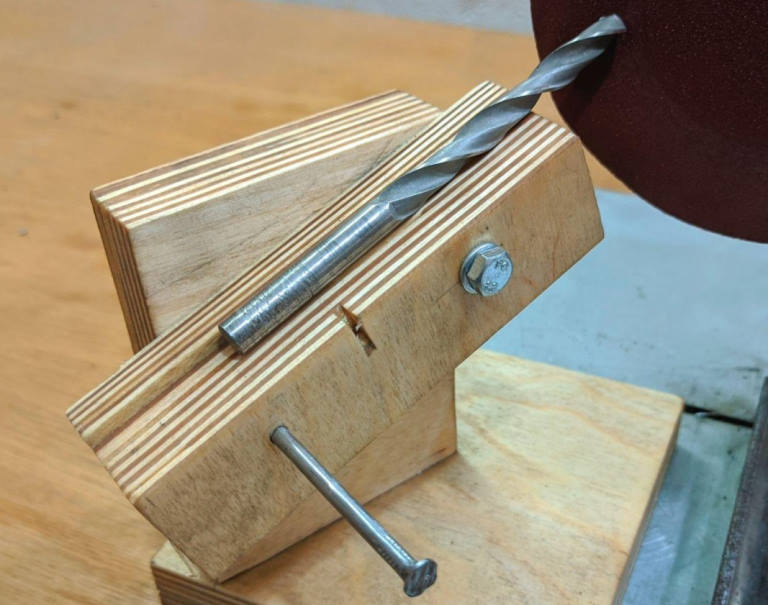
Then, following the line, drill a hole into the block. So, when you insert a drill bit into the hole, its land will match perfectly with the block surface, which allows you to sharpen your drill bits correctly.
After making the jig, follow our step-by-step guide to sharpening your drill bits with an angle grinder.
Step 1. Examine the bit
Different drills bits will wear out in different ways. After examining these bits, you can determine the amount of metal removal that you need to maintain the edge sharp. This will indicate whether a coarse or fine grinding disc is required.
Step 2. Fix the jig & angle grinder
Mount the jig in your workbench vice while retaining the bit in it.
Then, hold the drill bit in one hand and press it against the hole that you have drilled on the wooden block while holding your angle grinder in the other hand. The drill bit’s land must be in parallel with the wooden block’s surface.
Step 3. Turn on the grinder
Put your safety glasses on and start your grinder. Move the bit slowly and carefully until makes contact with the disc. Keep it straight and hold it at the original manufacturing angle (60 degrees), rather than turning or rotating it.
Step 4. Sharpen the landing
Maintain the drill bit against the disc at this angle for a maximum of 4 – 5 seconds. The goal is to merely grind away the bit’s dull surface, not to wear it down.
To attain the ideal angle, concentrate on grinding the bit’s heel, where the tip and the twisted shaft meet. The drill bit will not bore smoothly if the angle is not sharp enough.
Step 5. Cool the drill bit
After 4 to 5 seconds of grinding, take a break and cool the metal by dipping the bit in ice water. If you don’t do it, the drill bit will get too hot to grip and result in it wearing down faster.
When the metal bit is cool, you should inspect it to determine whether the side that you have just worked on has been sharpened to a decent point.
Step 6. Rotate & repeat
Rotate the bit 180 degrees and repeat the grind-then-cool process on the tip’s other side once you’re satisfied with its first side.
To allow the tool to drill straight holes, strive for the 60-degree angle, as well as an angle and point which have a similar width on the drill bit’s both sides.
Some people prefer to sharpening each side of the drill bit a little. They hold the metal bit with their dominant hand and continuously rotate the bit 180 degrees after grinding every few seconds to achieve even sharpness.
Step 7. Test the bit
Test the drill bit after it meets in a beautifully honed point and both of its edges are sharp & have the same width. Keep the tip perpendicular to a wooden piece, and use your hand to twist the drill bit.
If your bit is well sharpened, a hole’s beginnings should appear even with this modest pressure. If not, go back to the grinding disc and re-examine your tip. Aim for a 60-degree angle compared to the point with both sides having the same width once more.
Don’t get discouraged if you have to go back to the angle grinder multiple times. It’s all part of your learning process.
Step 8. Start drilling
After you’re satisfied with the sharpness of your bit, assemble the bit into the drill, and start stilling a block of scrap wood. It should immediately “bite” the wood even with minimal force. When you remove the bit from the wooden block, it should hurl wood chips.
Other Tools To Sharpen Drill Bits
If you don’t own a good angle grinder, there are alternatives that you can use to sharpen drill bits, including a bench grinder, a drill bit sharpener, diamond files, and a Dremel sharpening station.
1. Bench grinder
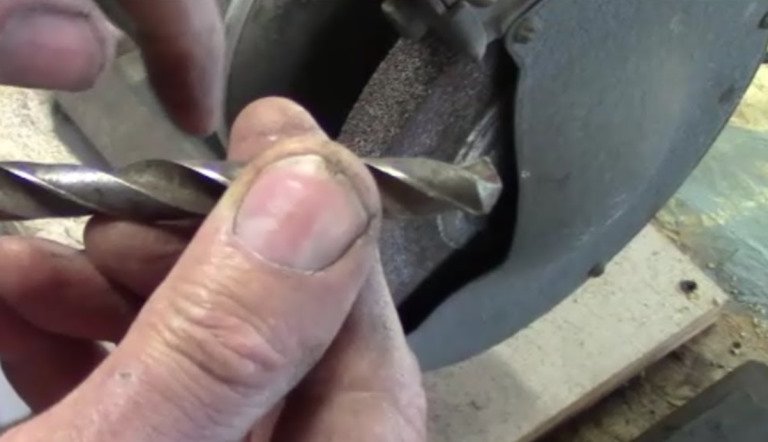
This is also a useful tool that is frequently utilized for drill bit sharpening. Nevertheless, a lot of machinists prefer to sharpening their drill bits manually because a bench grinder is too expensive for them.
However, if you choose to use a bench grinder, you should sharpen drill bits as follows:
- Turn on the grinder and stand back from its disc.
- Put the drill bit land against your grinder at a 60-degree angle.
- Clip the bit land on one side and use the bench grinder to grind it down.
- Make a little chisel angle by rotating your left hand in a clockwise direction.
- To sharpen the drill bit flawlessly, move your hands to cut, shape, and spin the metal bit.
- Sharpen the remaining of your drill bit by rotating it 180 degrees.
2. Drill bit sharpener
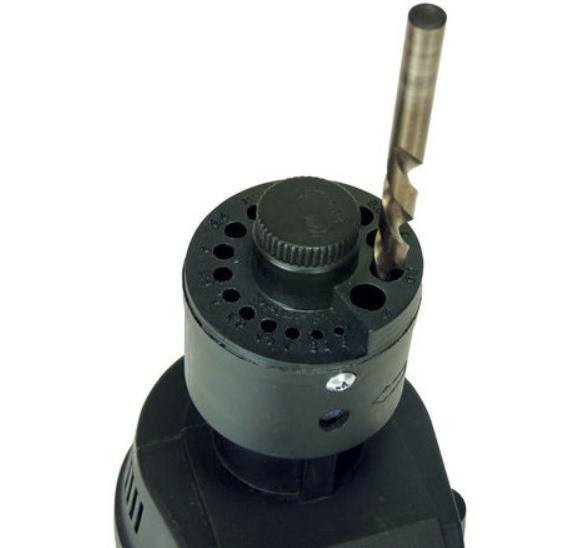
You can sharpen drill bits without having to master sharpening technique thanks to the drill bit sharpener. Using this tool, you will learn how to sharpen them more quickly. The basic steps are listed below.
- Turn the sharpener on and align the tool chuck’s white line with the elevated cam pin. Next, put the chuck inside the designated sharpening port.
- The lines will assist you in tracking the turns. Later, spin the chuck clockwise, from a white line to another, and repeat the procedure until there is no grinding sound.
3. Diamond files
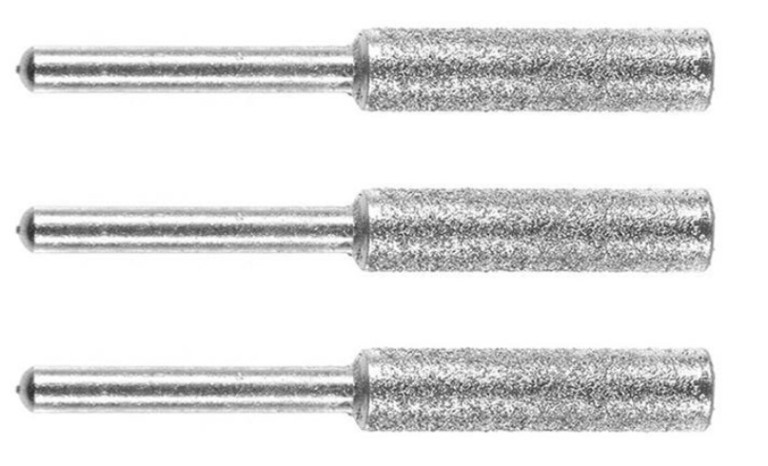
A variety of objects can be sharpened with diamond files without any additional attachment, including drill bits. Simply follow the instructions outlined below:
- Secure the dull bit with a strong bench vice.
- Move the bit along the file’s surface.
- During the relief, glide the metal bit slowly and cautiously.
- To produce a sharp tip, repeat the technique on either side of the bit land.
4. Dremel sharpening station
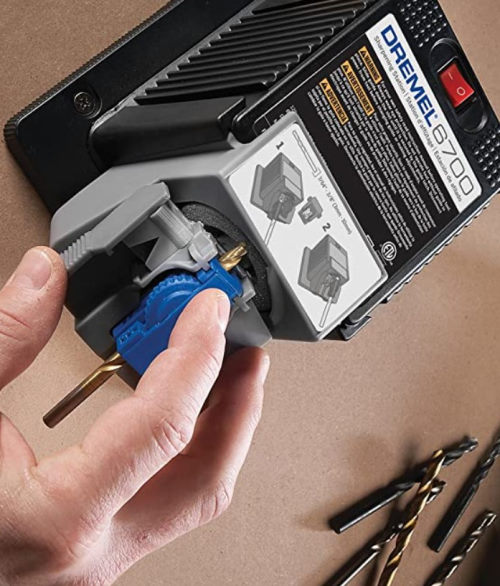
A Dremel sharpening station is a fantastic tool, which undoubtedly makes your job easier. However, remember that the Dremel tool can only sharpen bits with a diameter between 3/8” and 7/64”.
- Place the Dremel securely on a table to prevent it from moving as you work.
- Install the bit guide onto your Dremel motor unit.
- Remove the bit holder from the guide of the sharpening station and put the drill bit into the holder.
- Press the V block down against the holder when pulling the bit upward, then gently swivel the bit to retain it at a corresponding angle.
- Turn on the Dremel station and attach the holder onto the sharpening block when holding both the block and the bit together.
- Repeat step 5 with the bit flipped 180 degrees. When there isn’t any grinding sound, stop sharpening.
Important Notice!
There are some notices that you should keep in mind in order to safely sharpen your drill bits:
- Put on goggles before starting to sharpen the bits to protect your eyes from possible flying pieces.
- Don’t wear gloves because they can be stuck to the grinding disc, which takes your hand with them.
- Always be mindful and deliberate about the relative position between you and the sharpening device.
Tips To Keeping A Drill Bit Sharp
After having mastered the drill bit sharpening procedure, follow these 3 recommended practices to always keep them sharp:
- Pull out the drill bit after approximately 1 inch of drilling to blow away any wood chips or flakes. Otherwise, these chips will be crammed into the bit flutes, which will get extremely hot. When a drill bit becomes hotter, it will dull faster, necessitating more frequent sharpening.
- Turn the stop-and-cool approach into a habit, especially while drilling hardwood. Keep a jug of cold water close by and dunk the metal bits for some seconds after drilling every few inches.
- 2 complete sets of bits should be kept on hand. Some professionals use a brand-new set to start drilling a hole, then change to their older and sharpen bits to continue the job. This will help keep the superior set being sharper for a longer time.
FAQs
1. What angle should the drill bit be held when sharpening?
For optimal results, hold it with a shank tilted at roughly 59 degrees to your left. When the bit meets the grinding disc, tilt the shank more to the left and downward and spin the bit clockwise.
Final Words
Drill bits are available in various sizes and angles. Despite their strong resilience to heat and brittle conditions, they get dull and require regular sharpening. With the help of our article, now you know how to sharpen your drill bits with several sharpening machines, including angle grinders.