An angle grinder is a versatile tool to make quick cuts. Yet, to make long cuts, you need a firm supporting surface. An angle grinder jig is a simple, effective solution to make your cutting jobs more efficient.
This article will help you understand more about this supporting stand, why you need to have it in your workshop, and how to make a jig.
Contents
What Is An Angle Grinder Jig?
An angle grinder jig (angle grinder sliding cutting jig, angle grinder holder) is a work stand that helps cut materials with an angle grinder in a shorter time, with higher accuracy, and safer.
This supporting stand helps you hold the cutting material in one place and let the tool slide consistently along your marked lines with fewer faults.
You can use this stand for straight cuts on metal, wood, or any material that your grinder can handle, or even use it for knife making. Besides, you can also make consistent cuts in a pre-defined angle (like 90 degrees or 45 degrees).
How To Make An Angle Grinder Jig?
There are many ways to make an angle grinder jig. You can build a stand on your own to enhance the productivity of your daily applications. Below are some stands that are easy to make.
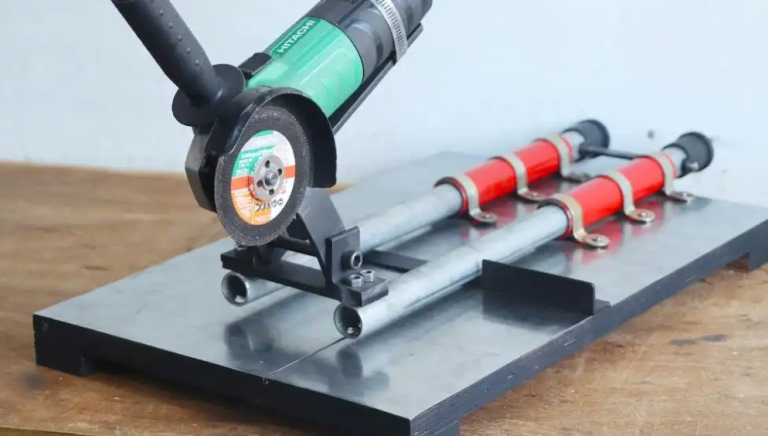
Project 1: Sliding cutting jig for angle grinders
Preparation
- 1 x plywood sheet with dimensions of 14×21 inches and a thickness of 18mm;
- 1 x sheet metal with dimensions of 14×21 inches
- 2 x Nos. galvanized pipes with a diameter of 1 inch and a length of 8 inches
- 2 x Nos. galvanized pipes with a diameter of ¾ inches and a length of 20 inches
- 1 x Metal plate with dimensions of 5.25×1.25 inches and a thickness of 6mm thickness
- 1 x Band metal plate with dimensions of 10×1.25 inches and a thickness of 6mm
- 1 x 1-inch L-section channel with a length of 14 inches
- 2 x Nos. 1.25-inch L- section channels with a length of 1.25 inches
- 1 x Metal plate with dimensions of 8.5×1.75 inches and a thickness of 5mm
- 6 x Nos. pipe clamps
- 1 x 3/8-inch allenky bolt half thread with a length of 4 inches, with lock nut
- 4 x Nos. ¼-inch allenky bolts with a length of 20mm, with nuts
- 2 x Nos. 8mm allenky bolt with a length of 1 inch
- 1 x 10mm allenky bolt with a length of 1 inch
- Screws
Step 1: Make a base
Make a base with a 14×21-inch plywood sheet and sheet metal. Attach the sheet metal on the plywood sheet with glue.
Step 2: Attach galvanized pipes
Use the 1-inch and the ¾-inch galvanized pipe for sliding purposes. First, attach the 1-inch galvanized pipes on the base of step 1 with clamps, and the ¾-inch pipes slide in the 1-inch galvanized pipes.
Step 3: Install metal parts
- Attach the 5.25×1.25-inch metal plate, the L-section channel, and the band metal plate on the galvanized pipe with ¼-inch allenky bolts and nuts.
- Attach the 8.75×1.75-inch metal plate on the band metal plate with two Nos. 8mm allenky bolts to support the angle grinder.
- Attach the rubber knob on the end of the galvanized pipes.
Step 4: Attach your angle grinder
Attach your angle grinder on the support plate with 10mm allenky bolts. Then, attach the 1-inch L-section channel (14-inch length) to the base with screws.
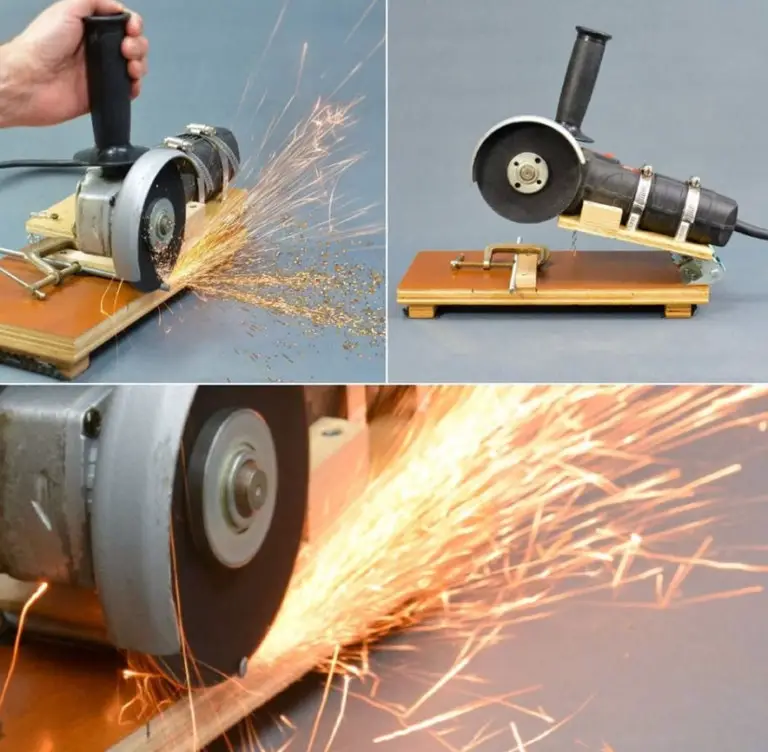
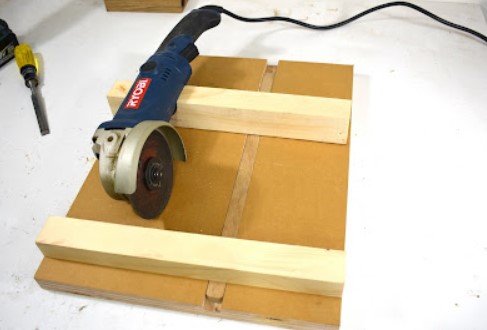
Project 2: Chop saw jig for angle grinders
Preparation
- ¾-inch plywood or 3/8-inch plywood
- Hinges (to hold the angle grinder)
Step 1: Make a base
Laid out all the pieces of plywood you will cut. Then, on the 3/8-inch plywood, mark where you will feed the hose clamps to hold the angle grinder. Use the cut-off blade of your tool to cut the wood.
Step 2: Assemble the major components of the angle grinder jig
Assemble all major parts of the jig and feed the hose clamps through the base. Then, attach your angle grinder to the base.
Step 3: Finalize your jig
- Add two tiny wood blocks to easily reposition the grinder.
- Add some feet under the base to have some extra space below and to avoid cutting into your workbench.
- Add some anti-skid material to the base to prevent it from sliding off your workbench.
Project 3: Angle grinder holder
Preparation
- 1 x plywood sheet with dimensions of 13.25×17.5 inches and a thickness of 1 inch
- 2 x plywood sheet with dimensions of 13¼ x 1½ x 1¼ inches
- 1 x caliper
- 4 x screws
Step 1: Make the base
- Prepare a plywood sheet with the dimensions of 13.25×17.5×1 inches. This sheet is also the base of the angle grinder jig.
- Make two miter blocks for the fence with the dimensions of 13¼ x 1½ x 1¼ inches.
- Screw the two blocks to the base. Use a speed square to ensure that all corners are squared.
Step 2: Make a 2×4 top support for the grinder
- Measure the diameter of the angle grinder’s handle with a caliper. Then, use a bandsaw to make a circle cut.
- After finishing the circle cut, trim the blade down to make the appropriate height for attaching your grinder to the support.
- Attach the top support to the bottom (the base) with 4 screws.
- Attach your grinder into the top support.
Step 4: Finalizing the jig
Attach a stop-block onto the jig, and your grinder is now ready for cutting.
FAQs (Frequently Asked Questions)
1. How thick of metal can you cut with an angle grinder?
It depends on the cutting capacity of your angle grinder, the size and type of the disc/attachment it is using, and the thickness of the metal you are going to cut.
For example, a 4.5-inch angle grinder with a flat diamond cut-off disc can cut thin sheet metal using a disc thickness of 0.8-1.0mm. But to cut thick steel like rebar or structural steel like angle iron, it needs to use a cutting disc with a thickness of 1.6-2.5mm.
2. Can you cut cast iron with an angle grinder?
You can cut cast iron with an angle grinder using a diamond cut-off disc fitted with your tool.
3. Can I use an angle grinder to cut paving slabs?
To cut paving slabs with an angle grinder, you need to use a diamond-tipped blade designed to cut masonry or stone.
Final Words
After reading the above information on the angle grinder jig, you have known that it is a simple yet add-on to make your angle grinder more versatile and supportive. And the most fantastic news is that you can make this angle grinder support quickly with a few pieces of wood and screws.