Natural stone, ceramic, or glass tiles are popular choices for decorating bathroom and kitchen areas. While a tile wet saw is the best professional tool, you might find it challenging to purchase it if you don’t work in the relevant industry. Cutting tiles with angle grinders is an inexpensive, accessible way to grind hard materials.
Contents
Tips For Cutting Tiles With An Angle Grinder
Cutting tiles is one of the common uses of this power tool. However, before learning how to cut tiles with an angle grinder, you should notice the following information to get the best cutting performance.
The Blade
You should choose the blade type based on the tile you are going to cut. For example, a diamond blade provides smooth cuts on ceramic or mosaic tiles, while a separated blade is suitable for natural stone tiles.
Make sure you attach the blade securely with the angle grinder using a tightening tool. Any vibration while cutting might lead to breaking the tiles.

Cover The Edge With Masking Tape
You should cover the tiles with masking tapes to prevent and deflect the chips from coming straight to you while cutting.
Mark, you cut lines with a permanent marker beforehand, then place the tapes on those lines and trace each line accordingly.
You can use a single layer of tape or more, but don’t overdo it.

Wear Safety Equipment
Cutting tiles with an angle grinder doesn’t only create a lot of dust and noise. It involves injuries if you aren’t well-prepared.
For a safety tile cutting result, please wear safety clothes and equipment before operating the grinder. The checklist includes:
- A high-quality two-strap dust mask: to avoid dust from getting into your eyes;
- Your preferred hearing protection tool (e.g., earplugs): to protect your ears from noise;
- Safety gloves and a long-sleeved shirt: to prevent sharp flying fragments from hurting your hands and your body.
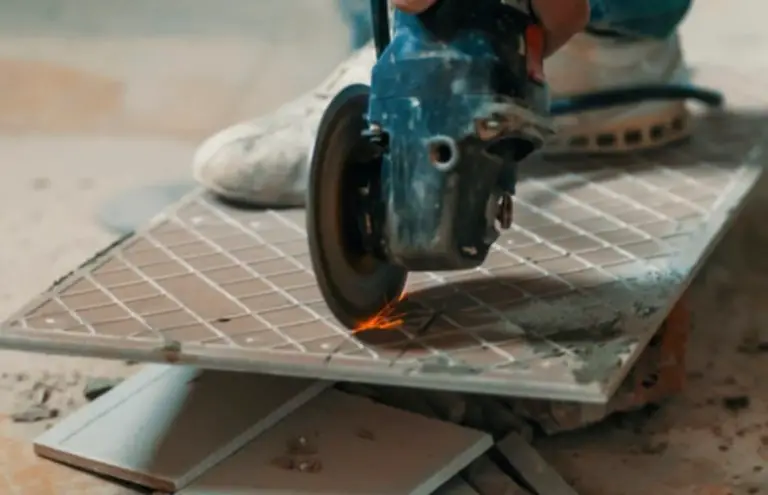
When cutting the tile pieces, make sure you hold the angle grinder firmly with both hands (horizontally for angle cuts and vertically for straight cuts) and push into the tiles. Then, clamp them to a cutting surface to get the best result. You can choose a grinder with a side handle.

Check now the list of 10 best-rated Angle grinders here!
3 Steps of Tiles Cutting Process by Angle Grinder
Step 1. Secure The Tiles
The tile cutting process will create a lot of dust and cause respiratory hazards or lung problems in the long run. Hence, you should cut tiles outside or in a well-ventilated area.
Secure the tile with a clamp on the cutting surface to keep it in one place.
After that, ensure you have been equipped with safety equipment, like safety glasses, gloves, earplugs, dust masks, long-sleeved shirts.
Step 2. Mark The Tiles
Measure the cutting area, then use a permanent marker to mark the cutting lines and shapes. The title shapes can be circular, square, or semi-circular.
After that, make sure that you use masking tapes to cover the tile corners before cutting. The tapes keep the tile edges of the porcelain glazing from chipping off while cutting.
Depending on your comfort level, you can use single or multiple layers of masking tape (but don’t overdo it!).
Step 3. Cut The Tiles
First, adjust the angle grinder to your desired cutting speed and pressure.
Then, use the blade to scribe a line on the top surface of the tile along the marking lines.
After that, push deeper into the tile to split it into two pieces. Avoid cutting near the tile edges since it will cause the angle grinder to slip, which can cause injury for you.
After cutting, you should use the diamond blade’s flat side and sandpaper to smoothen out the tile’s edge.
You will love: Top 7 Best Angle Grinder For Tile Cutting
How To Cut Tiles Into Different Shaped Cutouts?
Circle Cuts
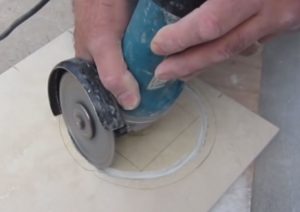
Sometimes, you need to do circular-shaped cuts to make holes for floor drains and shower valves on your bathroom’s wall.
To cut circle cuts on tiles:
- First, you need to tilt the grinder’s blade about 30 degrees along the circle marking lines to make the first cut with a depth of 1/16 inches on the top surface of the tile.
- Next, make a second angle cut at about 1/6 inches deeper until the two pieces are separated.
- Finally, use the flat edge of the blade to smooth out the cutting line for a perfect curve.
Semicircular Cuts
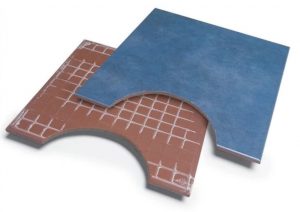
You can make semicircular cuts on tiles using a similar technique on circle cuts.
- First, score the profile of the tile.
- Then, make short rough cuts starting from the two edges of the semicircular with less waste as possible. After that, make several deeper cuts following the scored line.
- Finally, use the round edge of your diamond blade to grind the edge of the cut smoothly.
Dish-shaped Cutout
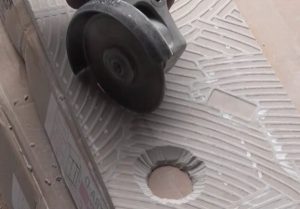
Almost all plumping pile holes on travertine tiles are hidden with an escutcheon or a fixtured base, so you don’t need to make perfectly round holes.
To make a dish-shaped tile cutout for small holes, you need to make two plunge cuts:
- On the back of the tile, mark a secondary smaller circle in the center of the plunge hole and make the first plunge cut on the smaller circle.
- Make a second plunge cut on the bigger circle and repeat this process until the circular hole is finished.
Rectangular Cutouts
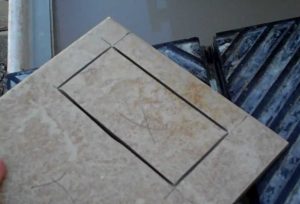
You can make rectangular or square cutouts for electrical outlets easily. Remember not to cut beyond the shape’s corners where the cutting lines will be visible.
- First, use a permanent marker to precisely mark the cutting lines on both sides of the tile. Cut straight to make the first score line about 1/16 inches deep on the front side of the tile.
- Flip the tile to make a plunge cut and stop at corners where the cut lines meet the marked square on the front side. Continue plunge cut on the three remaining sides.
Final Words
In sum, cutting tiles with angle grinders is more accessible than a wet tile saw, provided that you have experience with this handy tool and you are not in a rush.
Safety comes first when it comes to cutting any tile types or shapes. So make sure that you read my safety cautions, prepare necessary safety clothes and tools, and follow the above steps to make your perfect cuts for your upcoming projects.