Different tasks may require different types of angle grinder discs. Moreover, after being in use for a while, the disc can get rusty and you need to replace it with a new one. Both situations require your tool a blade removal.
Therefore, how to change angle grinder blade is important know-how that every user should have to operate their tool safely and properly. So, how should you do it?
Contents
How To Change An Angle Grinder Blade?
Depending on the equipment you currently have, there are many ways to remove an angle grinder wheel. The simplest option is using the factory keys that are included in your grinder’s original package.
If you can’t find the keys, you can still remove the disc by hand.
Step 1. Unplug Or Remove The Battery

It is critical to unplug your angle grinder’s power source to prevent injury from unintentional use.
If your angle grinder is corded, ensure that it is disconnected from the outlet on the wall before using it.
By contrast, if you own a cordless one, remove its battery. This also makes your tool lighter and easier to handle when you change its disc.
Step 2. Remove The Disc
With Factory Keys/Spanners
Two different keys, shaped like flat wrenches, are included with your newly purchased angle grinder. One resembles a standard wrench, while the other looks like a fork with two prongs.
To begin, locate the 2 holes in your grinder’s motor and its disc. The prongs should then be inserted. After that, secure the drive bolt on the disc’s bottom using the wrench spanner or the adjustable wrench.
To stop the disc from spinning, use the pronged wrench in the direction opposite to the disc’s direction arrow. Finally, rotate your angle grinder’s jammed nut till the disc comes out.
With Improvised Keys/Spanners
Mount the clamp handles around the lock nut bolt that holds the wheel in place. Insert a screwdriver into 1 of the holes that appear between the wheel and your angle grinder’s motor, and utilize the jaws to keep the grinder’s wheel from rotating.
Turn the screwdriver in the direction opposite to the disc’s direction arrow. If it doesn’t come off easily, you can push the screwdriver to move with a hammer.
With No Keys/Spanners
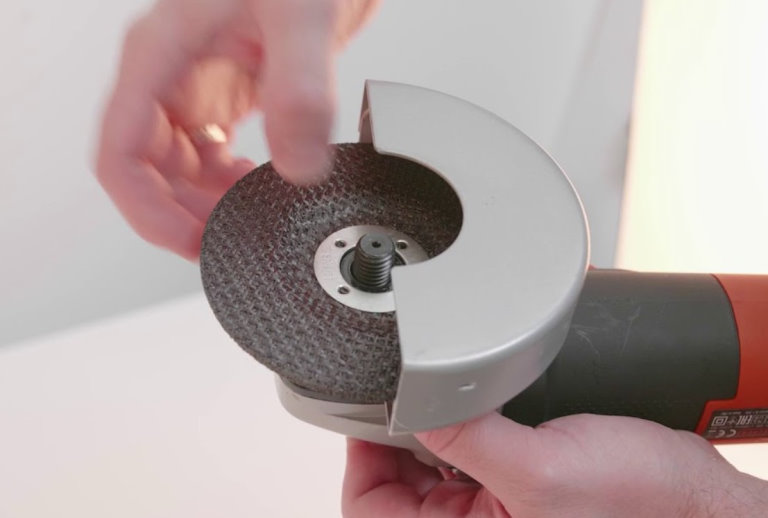
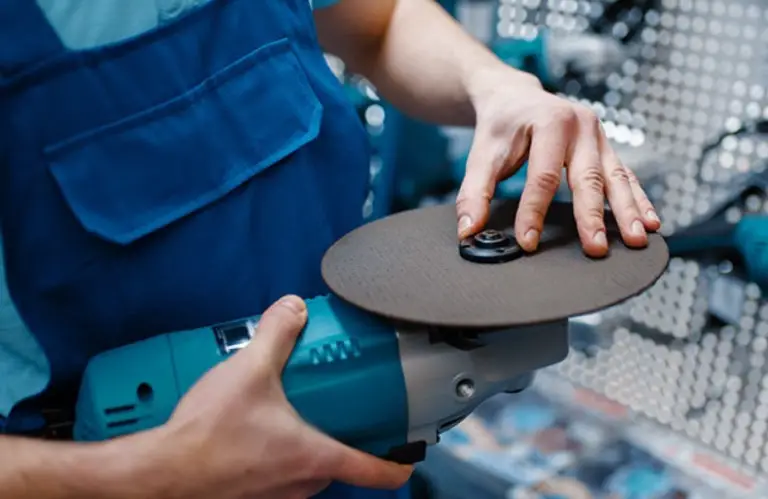
If you don’t have any available factory or improvised keys, you can still change your angle grinder blade by hand. Turn the wheel in the direction opposite to its direction arrow with your palm. This should sufficiently loosen the nut for your fingers to remove it.
If it does not work, break the old wheel into pieces using pliers to provide easier access to both the drive bolt and the retaining nut.
Regardless of the removal tool that you have chosen, there are some tips that you should know. Remember to lubricate the screw thread every time you change your grinder’s wheel.
Step 3. Install Your New Disc
Attach the new wheel to the drive bolt in a similar way as the old disc. It’s critical to utilize a disc designed specifically for your angle grinder’s make & model. If you are unsure, take your old wheel to your local hardware store & ask an employee.
Finally, tighten the new wheel in the opposite direction to the removal process. Your tool should be in good working order. If there has been a dry crust formed, penetrating oil might be used during the unscrewing procedure.
How To Remove The Blade Without Tool?
If you have lost the factory keys included in your angle grinder’s original package, or you have purchased a used tool without those keys, you can try the following methods to remove your tool’s disc.
Method 1. Utilize A Gas Wrench
Use an adjustable gas wrench to gently loosen the nut. Remember not to exert too much effort because the lock nut can be crushed, and the rotation lock can be broken.
Method 2. Make A DIY Key
This method requires a long nail of at least 4 inches. The cap must be removed as well as its tip, and the nail must be shaped into a U. The nail should be bent so that its stands can be inserted in the flange holes.
When the nut is securely fastened, place a metal bar between the nail’s posts and rotate this structure in a circle’s movement while gripping it with your hands.
Remember to hold and press the spindle lock button. This method is safe, however, it is quite time-consuming and requires the use of extra equipment such as a hammer, a hack saw, and a vice.
Method 3. Utilize A Thin Chisel
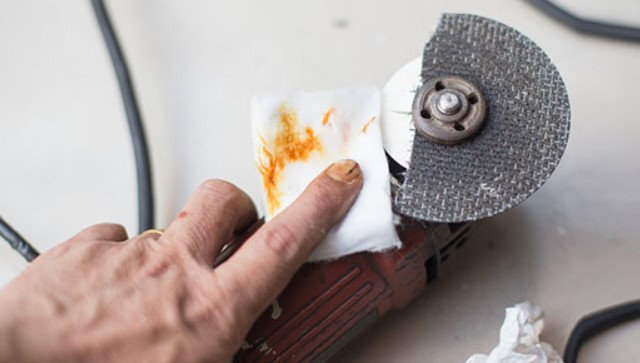
You can use the WD-40 fluid to lubricate the spindle shaft and wait for a minimum of 15 minutes before replacing the angle grinder’s disc.
Next, angle a thin chisel’s tip to the grinder’s flange nut hole, and use a metal hammer to carefully tap the hole’s entire surface. Due to the gentle tapping, the nut will eventually be removed, and you will be able to unscrew it manually.
This method has the drawback of causing damage to the holes and flange.
Method 4. Heat The Angle Grinder’s Nut
If it’s challenging to unscrew your angle grinder’s nut manually, heat the nut with a welding machine and alternatively a gas burner. To avoid burning yourself. Remove the flange while wearing gloves.
This is the riskiest method that we have proposed. The bearings and oil inside the gearbox can be overheated.
Removing A Broken & Tightly Clamped Blade
Changing an angle grinder’s wheel is typically simple and takes less than one minute. However, what will you have to do if the nuts have been trapped or rusted?
In most circumstances, there are various options for dealing with a jammed angle grinder’s wheel or its mounting bolts. Here are a few solutions:
- Clamp your angle grinder’s wheel in the vice and unscrew the nut
- Cut the screw nut with another angle grinder
- Use a remover specifically for rust
- Use a nail
- Heat the angle grinder’s nut
When To Change Your Angle Grinder Blade?
Regardless of the angle grinder brand you own, whether it’s Dewalt, Ryobi, Makita, or Milwaukee, there are some general rules of thumb for when you should replace your tool’s blade.
1. The Suitability Of A Blade To A Specific Job
An angle grinder’s blade is among the machine parts coming in contact with the materials you are working on.
The discs come in a variety of shapes and sizes. Each type of angle grinder discs is suitable for a specific job. So, you’ll need to select the appropriate disc while transitioning from a task to the next one.
For instance, the blade that you use to cut aluminium, metal or concrete objects is different from those used to cut through cast iron tubes or bricks.
2. Level Of Degradation
Even if your angle grinder is only used for a single purpose, its disc will eventually wear out and need to be replaced. Keep an eye out for the following indicators that it’s time you replaced the disc:
- The wheel is bent;
- Visible defects on the wheel’s abrasive surface;
- The disc edge appears or feels smooth;
- There isn’t much abrasive material left;
- Unusual vibration when in use;
- Strange sounds during use;
- Decreased cutting speed.
Final Words
Learning how to replace a blade on an angle grinder is crucial know-how for every user as this replacement will eventually happen one way or another.
The easiest removal tool is the factory keys that came with your purchase of the angle grinder. However, the tools you can use for changing the machine’s blade can be varied, from improvised keys to by hand. Also, keep an eye out for signals for disc replacement.