Angle grinders are popular tools for both professionals and hobbyists. They can handle a variety of tasks, including grinding concrete, cutting metal, removing dust, and many more.
But, how to use an angle grinder safely and properly for each of those specific jobs? Here is our guide with detailed instructions.
Contents
10 Steps When Operating An Angle Grinder
If this is your first time using this tool, please be aware that there will be risks if you use it improperly. So, firstly, you should be careful in choosing the best angle grinder for the job you need to do, after that, follow this 10-step guide as a rule of thump to use grinder safely.
1. Wear Protection Gear

Flying debris, such as bits breaking off from workpieces or your angle grinder’s attachments, is among the most dangerous aspects of using this tool. Therefore, protect your eyes with safety gears like safety goggles and full-face shields. Moreover, wear work gloves and long-sleeved shirts to protect your arms and hands.
Additionally, the sound that an angle grinder creates can be very loud. So you should use earplugs or noise-canceling earmuffs for your eardrum safety.
Lastly, put on a dust mask for very dusty jobs, such as sanding and grinding mortar.
2. Make Sure The Accessories Match The Rpm
All attachments have maximum rotations per minute (RPM). Excessive RPM could cause any accessory to fall apart and send flying debris your way.
As a result, the attachment’s RPM must meet or surpass your grinder’s maximum RPM. The reason is that even if you push the tool to its maximum RPM, you won’t exceed the accessory’s maximum speed.
3. Hold It With Two Hands

Hold your angle grinder’s handle with whichever hand you feel the most comfortable. If there is a dead-man switch on your tool, hold onto the switch with the same hand.
This switch must be held in place when you turn on the tool for it to operate. It is also a safety feature because your grinder will automatically turn off if it is dropped.
Your other hand should be used to support your tool’s weight.
4. Let It Run At Its Full Speed First
To turn on the tool, press its power button. Then allow the grinder to reach its maximum speed before you cut, grind, or sand your workpieces, which will assist you to keep the movements smooth and consistent.
5. Move It Constantly
When sanding, you shouldn’t maintain your angle grinder in one area or you can get gouges. To achieve a smoother finish for your workpieces, move the tool in a circular motion across their surface.
If you aim to make a specific area smoother or cleaner, don’t keep your grinder in one place. Instead, move it about and over the surface until you are satisfied.
6. Sanding & Grinding With Light Pressure
Simply place your angle grinder on the workpiece and let the disc’s rotation cut or grind it for you. If you put too much pressure on the object, your grinder can yank on the workpiece. This can cause it to kick, which may cause injuries.
7. Position It Properly
Sanding should be done with the grinder at an angle between 5 and 10 degrees compared to your work surface. The angle increases to 15 – 30 degrees for grinding, and the wheel’s flat part is good for this task.
By contrast, cut the workpiece with the wheel’s side, which means holding it perpendicular to your workpiece.
8. Always Keep The Guard
On some of your projects, the guard might be considered an obstacle, however, don’t remove it. If the disc or attachment shatters, their flying debris can lead to injuries.
Therefore, the guard should stay on to take the hit instead of either your body.
9. Don’t Put It Down Until Full Stop
The angle grinder’s disc can move about on the surface you place it on if it doesn’t fully stop. If your tool has a braking system, apply it to ensure that your angle grinder has completely turned off. Otherwise, simply wait for the tool to reach a complete halt.
10. Unplug
The last thing you would want is your grinder turning on by accident, and simply turning it off won’t suffice. You should unplug it to eliminate the possibility that it will turn on and injure you or somebody else.
When your angle grinder is not in use, place it on a table with the disc facing up.
How To Use An Angle Grinder For Different Jobs?
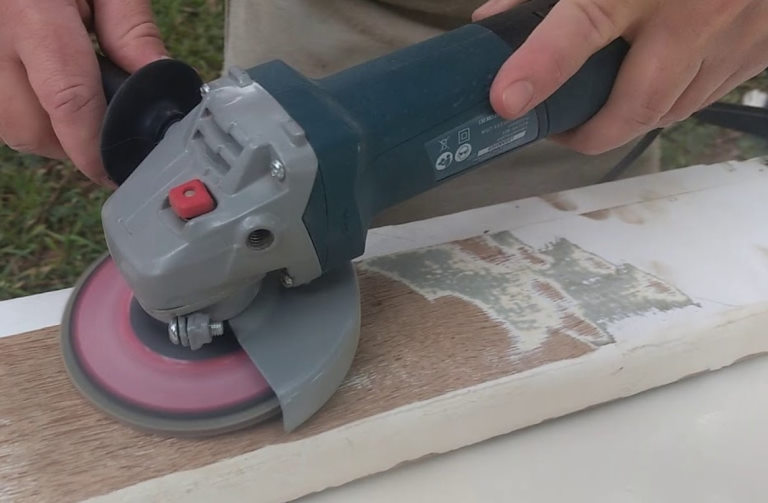
1. To Clean & Remove Paint/Cement/Dust
- Recommended disc: Wire or Brush
Angle grinders can easily remove flaking paint, dried cement, or rust off metal if you have the correct wheel. There are many wire brush-style discs available, each suited for a certain kind of deburring, stripping, and cleaning work.
Secure the workpiece
Once making sure that you have the suitable wheel for the job, keep your workpiece in place. Clamp your workpiece either on a workbench or in a vice before using your grinder.
Because wire brushes can get caught and kick back, ensure that the wheel is not spinning in your direction. You can see its rotating direction by looking at the arrow symbol on your angle grinder.
Remove the materials
Then, you can start removing materials like paint, cement, and rust. Raise the speed of your grinder and slowly lower the disc on the paint/cement/rust that you are attempting to remove. Ensure not to work into sharp, rough edges but away from them.
Because wire discs are so bendable, you can get into all the nooks and crannies.
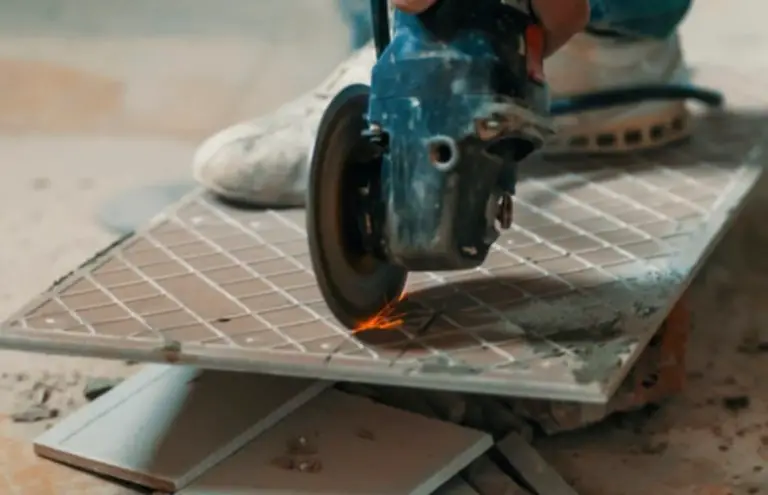
2. To Cut Tile, Stone & Concrete
- Recommended disc: Diamond
Marking up
First, you need to mark up the object. On the front and back of the stone/tile/concrete, draw a cut outline. Outline as precisely as possible since the more meticulous you are at this stage, the better your finished product will be.
Clamping down
Then, with the front of the object facing up, securely attach it to a workbench. If your workpiece slips while cutting it, you risk destroying it or injuring yourself, so be sure that it’s stable.
Score the front face
Turn on your grinder and score the tile’s, stone’s, or concrete’s front face around the marked outline. You want to score about ⅛ of the way throughout the surface.
Finish the cut
Flip your object over (so, now its back is facing up) and reclamp it. To create a clean, crisp square corner, make extended cuts marginally past the corners.
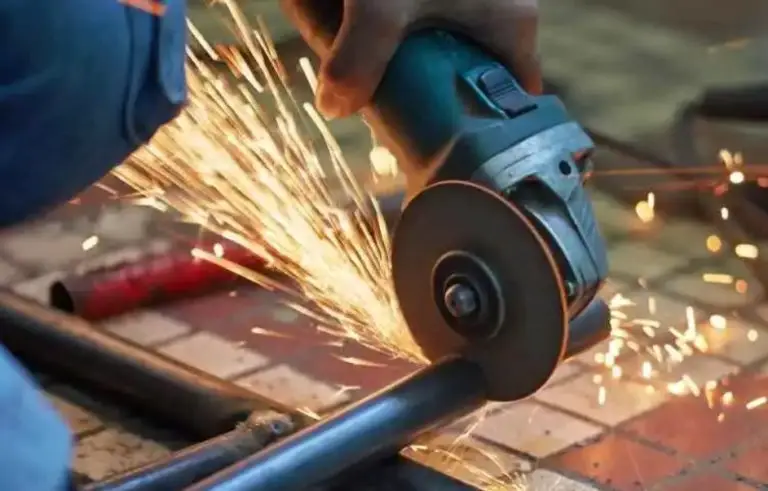
3. To Cut Metal Rods, Bars & Bolts
- Recommended disc: Cut-off
Prop the bar
If you are cutting bolt flushes in concrete or other materials, you can skip to the next step.
If you aren’t, secure the bar’s long side by carefully propping it. The bar’s shortest section should drop away after it has been cut. Before you begin, remember to put on your safety boots to prevent your feet from any falling objects.
Make the cut
Turn on your tool, and let its wheel attain a high speed.
Then, allow the grinder’s weight to do a majority of the job by dropping the disc through the metal. After being cut, the short section of the bar/rod will easily fall away from the long part.
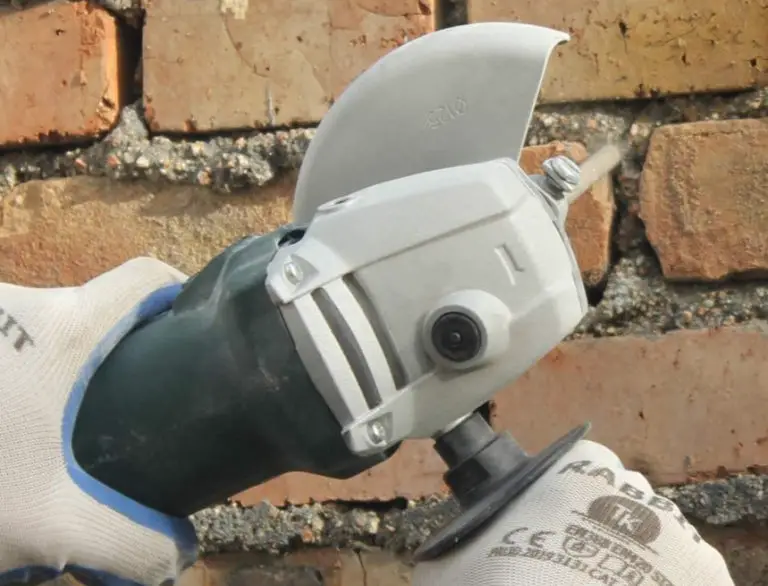
4. To Remove Mortar
- Recommended disc: Tuck pointing
Prepare for the dust
Removing mortar is among the top usages of angle grinders. However, you should expect lots of dust while working on this project. Put on a dust mask and shut all your windows.
Grinding the mortar
Once the preparation step is done, increase the speed of your angle grinder. Make 2 or 3 twelve-millimeter cuts into the mortar to clean up the junction.
To avoid damaging the brickwork, keep your cuts a few millimeters away from it.
5. To Refine The Edges Of Metal Tools
- Recommended disc: Grinding
Your grinder may be used to refine the edges of metal tools with the right disc. After that, you can improve the finish using a mill file (or Bastard cut).

Clamp the blade
Securely clamp your metal tool to a workshop bench with a c-clamp or a vice. Before you start, carefully check the spinning direction of the disc. Ensure that it’s rotating away from you to deflect any sparks.
Align the wheel
Your tool’s or blade’s cutting edge should be aligned with the grinding wheel.
Next, start your grinder and allow the wheel to spin at its maximum speed. Apply the most gentle pressure as you move it across the blade.
Move it
Move your angle grinder from the blade’s handle to its tip. Don’t swivel the grinder from side to side. Begin from the bottom and work your way up to the tool’s tip, then repeat.
Guide On Choosing The Right Attachment
There are various types of angle grinder discs for specific tasks including woodworking, buffing, polishing in addition to some usages mentioned above. Therefore, you should choose the most suitable one for the project to optimize the performance of your tool.
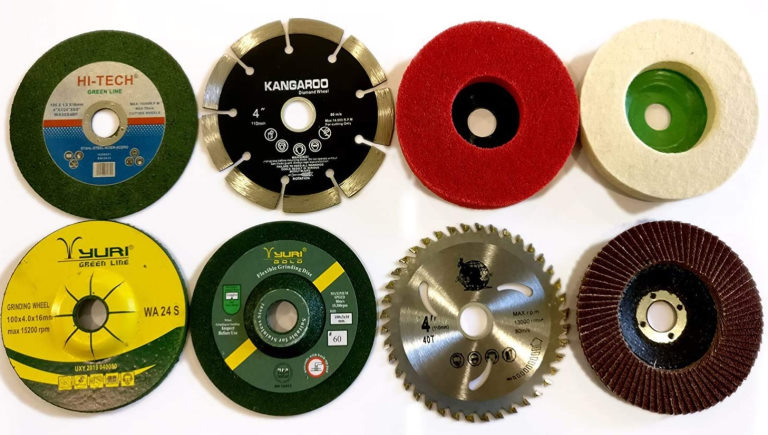
Angle grinder wheels are made from various materials. Generally, a diamond wheel will provide the most precision and polish. Moreover, angle grinder wheels feature a variety of abrasion levels. For tougher polishing surfaces, an attachment with higher abrasion levels will be ideal.
| Task | Recommended disk |
| Woodworking projects | Aluminium Oxide |
| Buffing and polishing | Buffing Pad |
| Cut metal rods, bolts & bars | Cut-off |
| Cut stone, concrete & tiles | Diamond |
| Restore edges & sharpen tools | Grinding |
| Remove rust & burrs from metal | Fibre |
| Clean metal; remove paint & rust | Wire/Brush |
| Remove mortar | Tuck pointing |
| Sanding, sharpen, prep surface | Sanding |
FAQs
1. Can You Use An Angle Grinder On Wood?
It can be used to cut, sand, carve, and shape your woodworking. However, you should have a suitable disc for the job such as an aluminum oxide wheel.
2. Can You Use An Angle Grinder As A Circular Saw?
Angle grinders are typically utilized for metal while circular saws are mainly used for wood. Even though the former can still be used to cut wood with a suitable disc, the end results are not the same as those done by saws. So they are not a perfect replacement for circular saws.
3. Can You Use An Angle Grinder For Polishing?
If you use a buffing pad as a grinder’s disc, you can use it for polishing your workpieces. Nevertheless, angle grinders generate more power than polishers. Therefore, they are more ideal for heavy-duty polishing, whereas you will need a polisher for more detailed work.
Final Words
We believe that with our article, you now know how to properly use an angle grinder for different types of projects. It’s crucial to remember that angle grinder uses are abundant. So, choosing the right attachment for a specific use plays an important role in guaranteeing your safety as well as efficiency.