The guard is among the essential components of an angle grinder. Due to the lack of information on its importance, some people choose to remove it from their grinder.
So, what can an angle grinder guard contribute to your productivity, and why using the guard on your angle grinder is compulsory for a safe working environment? This article will help you understand more about this safety attachment, how to install and use it correctly.
Contents
Angle Grinder Guard Types
There are two popular types of safety guard: disc/wheel guard & dust guard. The first one is compulsory and often included in the grinder’s package. The second one is optional as an accessory and often sold separately.
1. Disc guard
A disc guard is an essential safety component of an angle grinder. It prevents hot sparks and debris from flying towards you. It also protects the fast-spinning abrasive cutting or grinding wheels from hurting your arms, hands, and body.
Disc guards are classified by the size, type, and function (cutting or grinding) of the disc.
The necessity for using an angle grinder guard is so high that the safety compliance officers on almost all worksites will include guarding on the site’s requirements. In the OSHA regulations, it is required to use on all angle grinders. However, on some sanding and wire brushing applications, the guard can be removed to perform these jobs.
The latest disc guards can be adjustable in 180 degrees, while some models of Dewalt can offer more than that. However, this adjustment also takes time and can slow down your work if you are in a hurry to finish your job on time.
You should choose the right guard for the right wheel. For example, grinding wheels should be used with grinding guards. The standard guard for angle grinders is compatible with the Type 27 grinding wheel.
Below are some popular types of disc guards:
Guards for cut-off wheels (cutting guard)
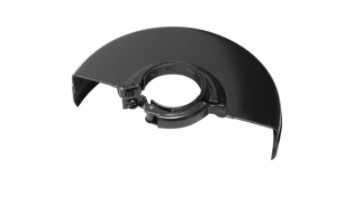
Cutting guards can come in open bottom design which is a common guard’s shape when you buy an angle grinder. This first type is often used for cut-off discs and is suitable for grinding.
More people prefer this adjustable guard on new angle grinders of well-known manufacturers like Makita, Bosch, or Black and Decker.
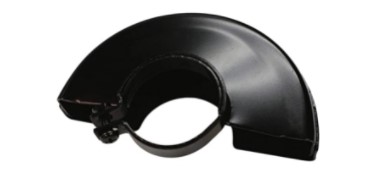
Guards for cut-off wheels can also have a completely enclosed bottom design. This second type often goes with Type 1 cutting wheels.
One main difference between these two types is that on the former (the open bottom design one), you can use the quick-release lever to move the guard from left to right and adjust its position quickly without tools.
Yet, there is no quick-release mechanism on the adjustable guard with a complete enclosed bottom design. Thus, you should use a number two Philips screwdriver to loosen and tighten the guard first before making an adjustment, which is not as convenient as the opened design.
Guards for cup wheels
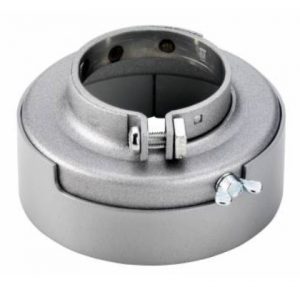
This is a typically adjustable guard for cup wheels and is often used on most angle grinders.
This guard can be used for grinding discs with a diameter of 115mm, 125mm, and 150mm, or ceramic cup wheels with a diameter of 80mm. If you use it on angle grinders with tool-free guard adjustment, you should remove the clamping lever first.
This is another type of guard for cup wheels (also called Flaring cup guard). This guard can also be adjustable and often used on large angle grinders.
2. Dust guard (dust extraction guard)
A dust guard (or dust shroud) is also an essential safety component of an angle grinder. It helps you perform your work while preventing you from inhaling dust generated from cutting, grinding, or polishing activities on materials.
If you use your tool without a dust guard for an extended period, you will suffer from serious long-term health issues, like pneumoconiosis (or dusty lung). The dust particles from grinding work can also dissolve into your bloodstream and lead to organ damages like your kidneys and brain.
Most of the diseases from inhaling this dust are incurable. Thus, you should be cautious when using this power tool and remember to get a dust guard at the time you buy an angle grinder.
Basically, dust guard comes in two types:
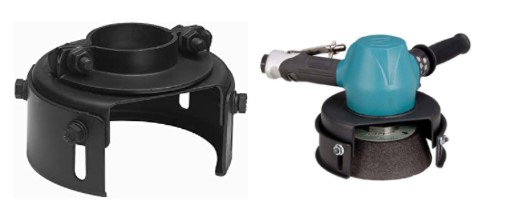
Cup Wheel Dust Guard (or Cup wheel dust shroud)

This type is suitable for grinding and polishing jobs. It has an integrated sliding element for quick adjustment even when wearing gloves.
Tuck Pointer Guard (or Dust extraction shroud)
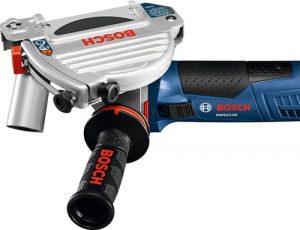
A tuck pointer guard is suitable for cutting jobs. It redirects the dust from reaching your face and body via the suction tube (or flush grinding door) while giving you an optimal view of the cutting area. This suction tube can also serve as an extra handle for comfortable maneuverability.
You can use a dust attachment by connecting it to your grinder, but remember to check if the attachment is compatible with your tool or not. Additionally, these two dust guard types can be connected with a vacuum cleaner via a universal vacuum hose connection.
How To Position Angle Grinder Guard?
To make the most use of an angle grinder guard, you should adequately attach the disc guard to the grinder for your maximum safety so that the least of the wheel is exposed to you.
The guard and the side handle should be on the same side (left/right side), and the guard’s outer lip should cover the wheel. By doing this guard placement, you can be totally safe from hot sparks or broken wheel fragments.
For cut-off wheels with an open bottom design, you can modify the guard quickly by turning the quick-release lever. But for guards that don’t have the quick-release mechanism, you must loosen the guard with a number two Philips screwdriver first, move the guard from left to right to your desired position, then use the screwdriver again to tighten the guard.
Do Angle Grinders Need Guards?
Angle grinders are among the most dangerous electric tools in agricultural and industrial settings. There are more than 5,000 documented accidents annually related to using angle grinders. According to some recent statistics by the Bureau of Labor Statistics (BLS) on injuries, there are two popular groups of users who often suffer from these accidents – the inexperienced people and the experienced ones who have been in this industry for 15-20 years.
As mentioned before, an angle grinder guard is an irreplaceable part of an angle grinder. But due to the lack of convenience in guard’s adjustment and assembly on some angle grinder models, some people prefer using angle grinders without guards. So, what happens if you use your angle grinder without a guard?
Performing your grinding jobs without a guard or inadequate guarding can lead to serious consequences like cutting through your flesh and bones. If you use an angle grinder with no guard, you will 100% be injured by your tool – said by Terry Tuerk, senior product manager of Metabo. To avoid accidental contacts with sharp discs, you should always wear gloves, have a safety guard properly installed on your tool, and be concentrated while using it.
In some sanding and wire brushing applications, you can remove the guard for your convenience. Yet, you still need to check the operator’s instruction manual and follow its safety guidelines.
How to remove angle grinder guards?
- Step 1: Unplug the angle grinder or remove the battery from the tool
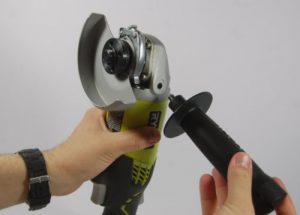
- Step 2: Remove the handle by holding the grinder with one hand, and use the remaining hand to turn the handle counterclockwise.
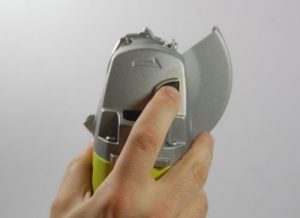
- Step 3: Remove the guard by pressing the spindle button, then use the provided spanner wrench to loosen the clamp nut. Then, use your finger to unscrew the nut.
- Step 4: Pull the cutting/grinding disc off the spindle. Then, remove the disc flange (or the spacer) by pulling it against the backside of the spindle.
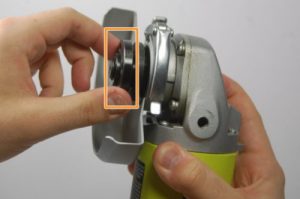
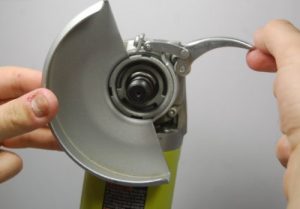
- Step 5: Completely loosen the clasp with the quick-release lever (or a Philips screwdriver – for guards that don’t have a quick-release mechanism). Then, lift it on guard. Then, rotate the guard to make its three notches align with the three notches on the grinding head. Finally, pull the guard off the grinder.
See more: Methods to replace angle grinder disc
FAQs (Related Questions)
1. Where should the guard be on an angle grinder?
The guard should be on the same side with the side handle for better protection. Its outer lip should cover the cutting/grinding wheels to prevent hot sparks or sharp wheel fragments from hurting you.
2. How do you fix an angle grinder guard?
If the angle grinder guard is broken, you can replace it with a new one.
- Step 1: Remove the nut from the grinder
- Step 2: Release the cam latch, then rotate the guard around until the tabs lie on the slots of the grinder. Pull the broken guard away from the hub
- Step 3: Remove the inner flange by placing a screwdriver under it and prying it off the O-ring on a spindle
- Step 4: Unlock the cam latch of the new guard, then slide it onto the hub. Then, rotate to lock it in place
- Step 5: Reinstall the inner flange and the nut to finish installing the new guard on your grinder
3. Why is the guard on the grinder adjustable?
It should be adjustable to maximize your comfort while performing different jobs at different angles and positions. Having an adjustable guard installed adequately on your grinder means you are always protected from severe accidents.
Final Words
After reading this article, you have understood that an angle grinder guard is a must-have safety component to maintain your cutting/grinding performance and prevent you from serious accidents when working with this powerful tool.
Check your tool’s specifications to choose a guard that is compatible with it. Besides, always remember to follow the manufacturer’s manual and use your grinder with concentration even when the guard is properly installed.